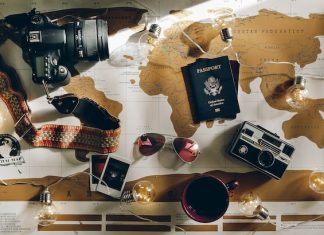
Any traveler will know on your return from the trip; there are always people who want to see the photos. We enjoy sharing our experiences with family and friends, which is probably the reason for this blog. The problem is that our photos are different from those in the brochures.
There are many reasons our photos are flat compared to the professionals, and we will try to point them out. We can improve our photos if we know how professional photographers do it. We will still need to produce the perfect photos constantly. A professional photo shoot can take weeks; a traveler has only a day or two to capture his photos.
Let us start at the beginning.
The Camera
In our day and age, we all have digital cameras. However, you do not need an expensive SLR camera to take good photos. Many of the photos on this site were taken with a cell phone. Besides our phones and expensive SLR cameras, there are also many Instamatic cameras. These are the cameras most of us use—aim and fire. Most of the cameras also have a button to zoom in or out. Thanks to technology, life has become easy. The size and type of camera do not matter when you are on holiday. It is how you compose the photos that will make the real difference.
Rule of thirds
This is a small change in photo composition with a huge impact. But, unfortunately, it is also the mistake most of us make when photographing something.
Divide your photo vertically and horizontally in thirds as indicated in the picture. The photo’s focal point (main topic) must then be on one of the four red dots. The ideal place for the focal point is point A, with point D being the weakest of the four positions. By moving the focal point away from the center and placing it in one of the positions indicated, the photo’s composition will have improved drastically.
Guiding Lines
The next thing to try and add to the photo’s composition is guiding lines. These lines form part of the photo that points in the direction of the focal point. In the first sample, the jetty points to the peak in the shape of a rhino horn. The rhino horn peak is the focal point. In the western hemisphere, we read from left to right, and our eyes are trained to start left. Therefore, we prefer to look at the photo from left to right.
The second sample is where the photo was flipped. Now our eyes immediately see the jetty. From the jetty, our eyes are directed to the rhino horn peak. Although this is a much-improved version of the original, it still needs improvement.
Horizon and water.
Most of us tend to put the horizon in the center of the photo. In this case, the lake’s edge is on the center line. All the water in the bottom half of the photo does not add to the composition of the photo. Why not crop the photo and cut away all the wasted water? This way, we keep what we originally intended to capture – the mountains and clouds.
Unfortunately, by cropping the photo, we lost the guiding line from the original photo. This can’t be easily fixed after the photo was captured. If the photographer had been sitting down when the photo was taken, the camera’s narrower angle would have reduced the lake’s size, and the guiding line would have been recovered. It would also have been possible to capture more of the amazing clouds.
Triangles
When capturing landscapes, triangles play an integral role in the composition. Try to place the focal points on the thirds or as close as possible to it. In the sample, we have the mountain close to the bottom third and the tree on the right-hand third with the bright blue sky in the resulting triangle—just one example of how a little thought can change the quality of a photo.
People and animals.
When photographing people try not to “amputate” any body parts, except of course when photographing a close-up portrait. Always leave more space before the person than behind, and try to get the eye(s) on the top right third. While traveling, this is only sometimes possible, as you sometimes have only a few seconds to grab the camera and snap away. In these cases, try to take the photo with as wide an angle as possible (no zoom). You can always crop the photo afterward. When taking portraits, leave as little as possible space above and behind the person but enough space in front to give the illusion that the person is looking at something.
The same rules apply when animals are photographed. Where vehicles are involved, try to keep the same rules for the vehicle as well. Additionally, if the vehicle is moving, it is always better to lower the shutter speed a bit to show the movement on the wheels (blurring on wheels).
Try to get a sparkle in the eye when photographing people and animals. This can be achieved by using the flash, even in daylight. The sparkle will give the object life.
Light
What makes us see? We see the reflections of light and interpret them as images. Science 101 teaches us that color is the reflection of light that we see. A green article will absorb all light but green. The green light will then be reflected in us, and we will see the article as green. A camera is a box that captures the reflected light.
To improve our photos, we must understand light and the interaction of light in our cameras. Photographers will always refer to light quality. Early morning and late afternoon will have better quality light than midday. This is because the sun is directly above us at noon. All the light, albeit bright, reflects mostly back into the sky and forms what is known as dull light. The photo of Singapore is a good example. When the sunlight reaches us at an angle, various objects reflect light, creating the illusion that the sky is brighter. The result is that our photos are brighter and more alive. The best way to see this reflected light is at sunrise and sunset.
When we capture photos, we must also ensure that we only allow a little light through the lens. This is done by increasing the shutter speed. Suppose we use “floating down the river” above as an example. The boy’s back is whitened so that all the detail is lost. If the shutter speed had been faster, more detail would have been visible in the photo. It is always possible to add light to your photo using editing tools. Unfortunately, detail lost due to over-lighting can not be replaced. I try to change my shutter speed to one or two clicks faster than recommended by the camera. Unfortunately, this option is not available on my old cell phone.
Editing
Photo editing is a topic that is discussed at all photo clubs in the world. Is it good or bad? Before digital photography, only people in dark rooms could edit photos or the negatives. We believe in minimal editing—setting brightness and contrast, sharpening photos, and cropping the photo to size. In a few cases, we will enhance the color of the water in our photos. The reason for this is that digital cameras, in general, do not capture certain colors very well. Turquoise is one of the problem colors that require enhancing.
Just remember, editing cannot turn a bad photo into a good one, but it can turn a good one into a masterpiece. Ensure you know your editing software; it is a sure way to impress your family and friends.
And lastly, remember to make your photos personal and include all the people in your touring party. Ask someone to take a group photo or two as well.
Happy snapping.


